Overview
After executing reviews, the target documents will be revised based on review issues.
Here is described how to check issue contents and enter revised contents to a review file.
Steps of Revising Issue
The flow for revisign issues are as follows:
- Checking Issue Contents
You should check contents of issues to whick you are assigned for revising. - Revising Documents Based on Issues
The target documents will be revised based on the issue contents. - Entering Revised Contents
Revised contents will be entered to a review file with updating issue status.
Checking Issue Contents
- Select [Tile View] or [Grid View] from [View] menu to show the issue list.
- It is useful to use filtering function to filter issues on the list. Click ? icon to show filtering options for issues. The filtering options are as follows:

No. Option Details 1 Status Filtering issues with specifying the status. 2 Member Filtering Issues to which you are assigned for adding, revising, or confirming. You can set OR conditions with specifying multiple options. 3 ID Filtering issues with specifying ID. You can set the OR conditions with specifying multiple IDs separated by a space.
* ID is used for identifying issues in a review. It is automatically assigned to issues on adding.4 Key word Filtering issues with specifying text for “Description”, “Comment”, and “Custom Field 1 – 10” - Move the cursor to the target issue on the list, and click [Detail] button to show the [Detail] screen.
- Click [Reported] button on the [Detail] screen to check the issue contents.
Revising Documents Based on Issues
You should check issues to which you are assigned for revising, and revise the target document.
Entering Revised Contents
- Move the cursor to the target issue on the list, and click [Detail] button to show the [Detail] screen.
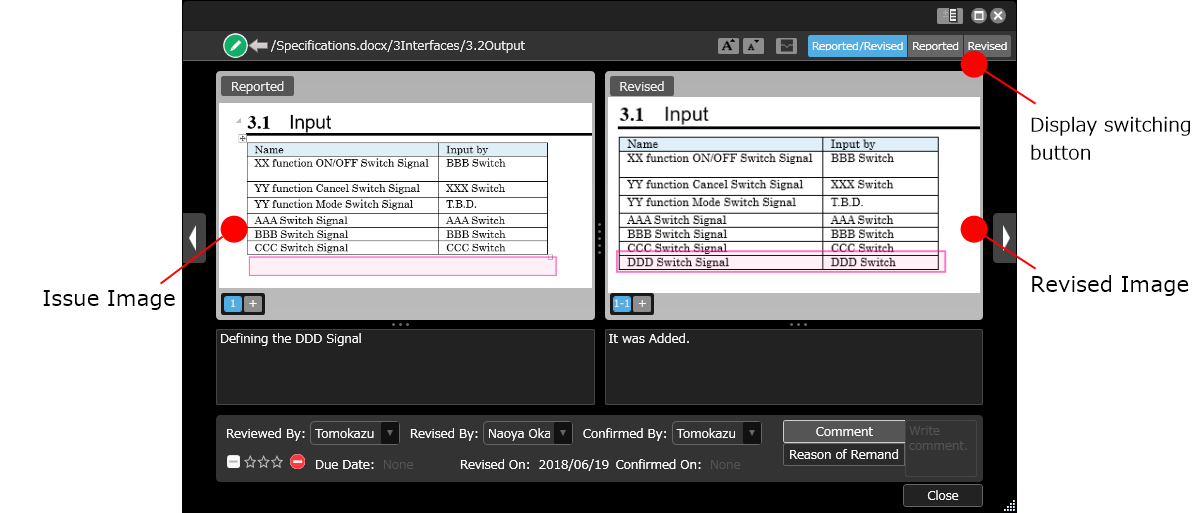
- Click [Reported/Revised] button to show the screen for entering revised contents. You can work with a larger screen with clicking [Revise] button.
- Click [Click Here To Capture].
- Drag the area for revising to capture the screen.
- Specify the location for revising with dragging. A pink frame will be added.
- If you have multiple locations for revising, click
 icon to save multiple images.
 - Enter contents of revising in the textbox below the captured image.
- Click [Status] icon on the [Detail] screen or on the [Properties] pane to update the status from “Not revised”
 to “Revised”
 .
.
[Detail] screen